mini-siem-elk
Install Kibana on Ubuntu Server VM
This guide outlines how to install, configure, and access Kibana 8.17.4 on an Ubuntu VM. Kibana provides the user interface for visualizing data stored in Elasticsearch and forms a key component of your Mini SIEM system.
📥 1. Download, Verify, and Extract Kibana
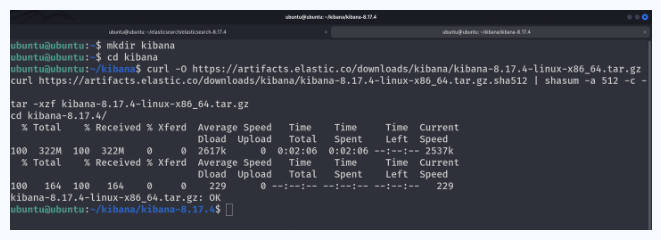
Download Kibana, verify its integrity, and extract it to the elk_stack directory:
curl -O https://artifacts.elastic.co/downloads/kibana/kibana-8.17.4-linux-x86_64.tar.gz
curl https://artifacts.elastic.co/downloads/kibana/kibana-8.17.4-linux-x86_64.tar.gz.sha512 | shasum -a 512 -c -
tar -xzf kibana-8.17.4-linux-x86_64.tar.gz
mv kibana-8.17.4 ~/elk_stack
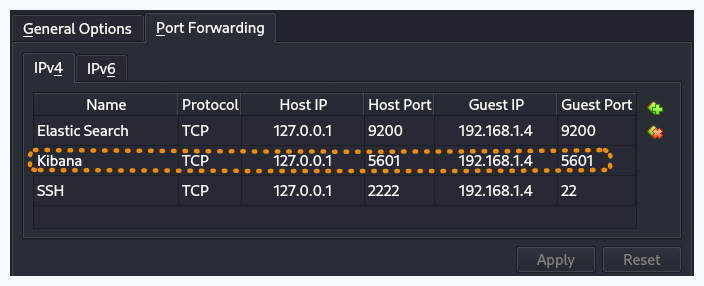
🌐 2. Configure Host Access (VirtualBox)
To allow Kibana to be accessed from your host machine, edit the configuration file:
nano ~/elk_stack/kibana-8.17.4/config/kibana.yml
Add the following line:
server.host: "0.0.0.0"

Then update NAT network port forwarding in VirtualBox to forward host port 5601 to guest 5601.
🚀 3. Start Kibana
Run Kibana from the installation directory:
cd ~/elk_stack/kibana-8.17.4/
./bin/kibana
Wait for Kibana to start successfully. It will display a unique URL for browser access.

⚙️ 4. Access and Configure Kibana
📌 Step-by-Step Initial Setup
-
Open the browser on your host machine and visit the Kibana setup URL shown in the terminal (e.g.,
http://0.0.0.0:5601/?295798). -
You will be prompted to enter the enrollment token. This token was displayed when you first started Elasticsearch.
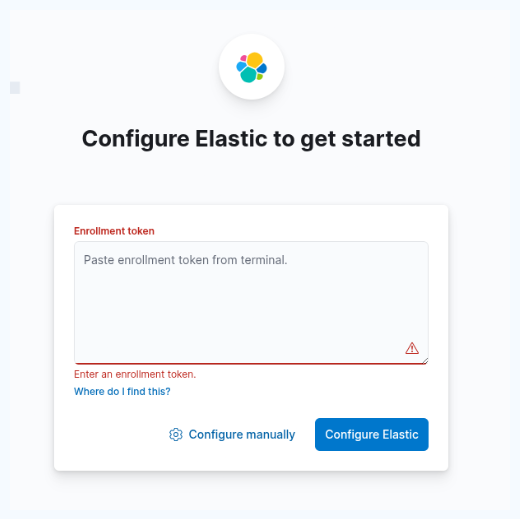
- Paste the token and click Configure Elastic.

- Enter the username and password generated during the Elasticsearch setup (typically
elasticand the saved password).
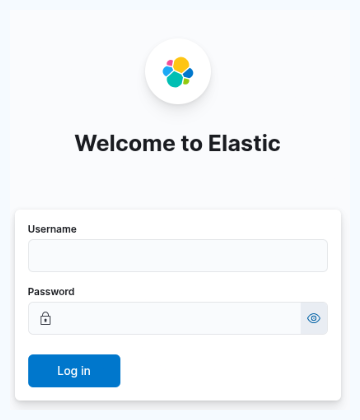
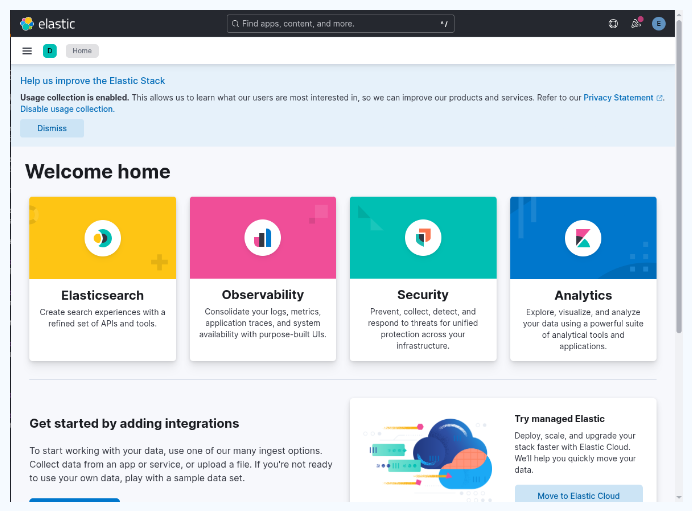
- Upon successful login, Kibana will initialize.
📁 Screenshots
All referenced images in this document should be stored in:
/images/02-install-kibana