mini-siem-elk
Install Elasticsearch on Ubuntu Server VM
This guide explains how to install and configure Elasticsearch 8.17.4 on an Ubuntu VM as part of a Mini SIEM project.
📥 1. Download and Install Elasticsearch
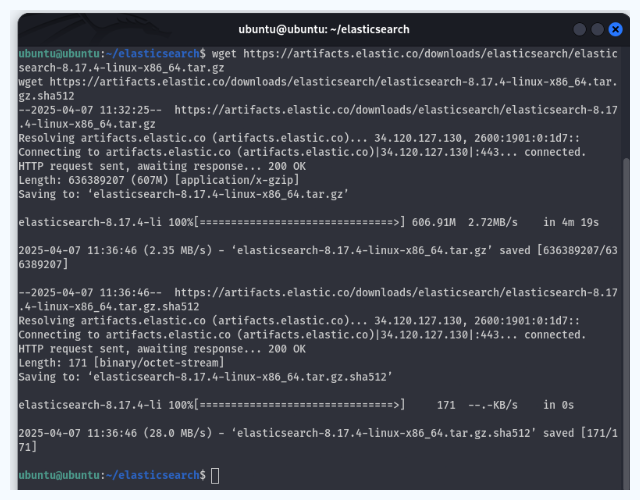
Download and extract Elasticsearch:
wget https://artifacts.elastic.co/downloads/elasticsearch/elasticsearch-8.17.4-linux-x86_64.tar.gz
tar -xzf elasticsearch-8.17.4-linux-x86_64.tar.gz
mv elasticsearch-8.17.4 ~/elk_stack
🔐 2. Verify SHA Checksum and Unzip Again (if needed)
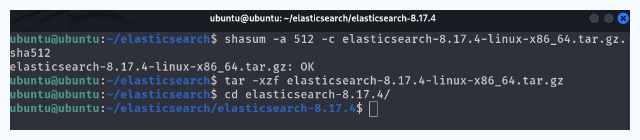
Verify the integrity of the downloaded archive:
shasum -a 512 -c elasticsearch-8.17.4-linux-x86_64.tar.gz.sha512
tar -xzf elasticsearch-8.17.4-linux-x86_64.tar.gz
🚀 3. Running Elasticsearch
Start Elasticsearch manually:
cd ~/elk_stack/elasticsearch-8.17.4/
./bin/elasticsearch
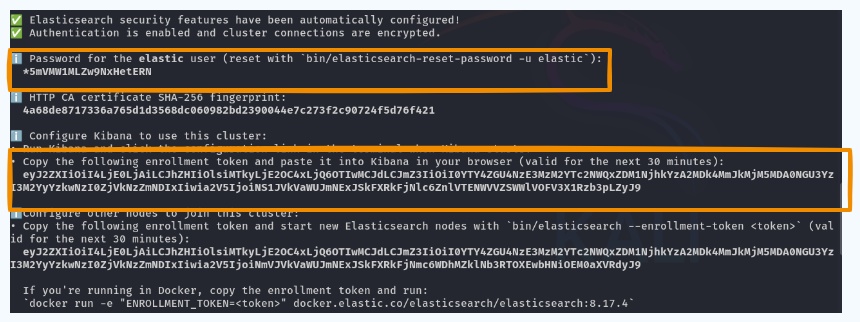
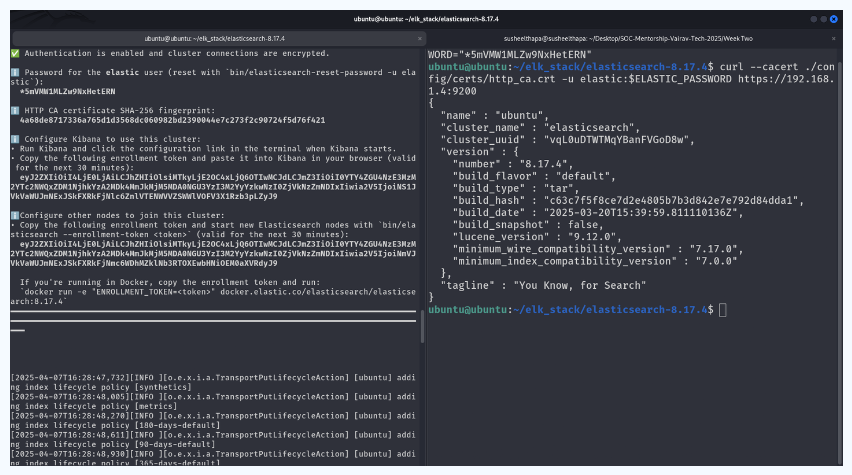
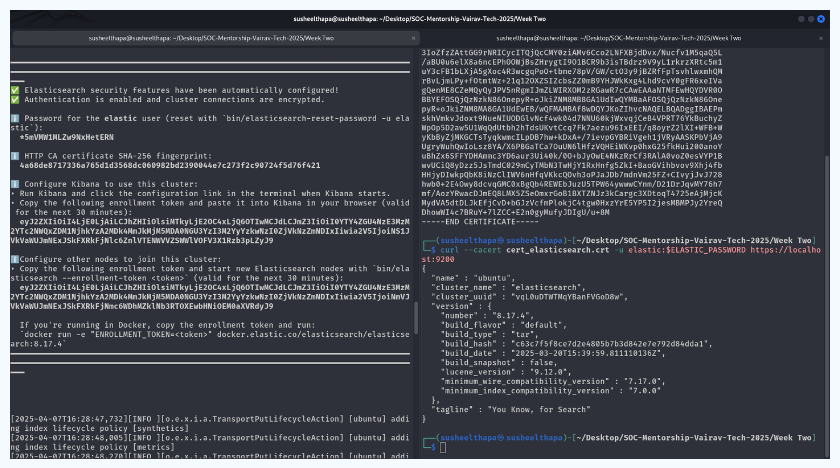
📝 On the first launch, Elasticsearch will generate default credentials and security certificates. Copy and save this information for later use.
✅ 4. Testing Elasticsearch Locally
Use the password generated during first launch to test the connection:
export ELASTIC_PASSWORD="*5mVMW1MLZw9NxHetERN"
curl --cacert ./config/certs/http_ca.crt -u elastic:$ELASTIC_PASSWORD https://192.168.1.1:9200
⚠️ Replace
192.168.1.1with your actual IP address.
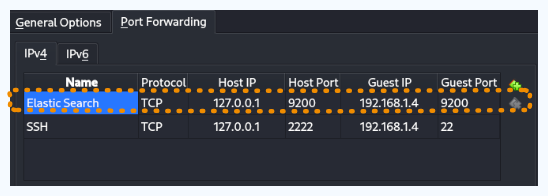
🌐 5. Enable Host Access (VirtualBox Port Forwarding)
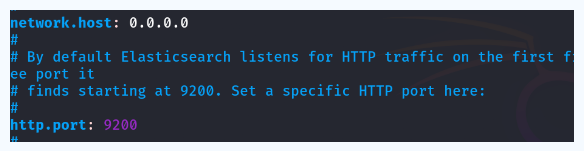
Edit the main config file:
nano ~/elk_stack/elasticsearch-8.17.4/config/elasticsearch.yml
Set the following:
network.host: 0.0.0.0
http.port: 9200
Why?
0.0.0.0binds Elasticsearch to all interfaces, enabling access from the host system through port forwarding.
Stop and restart Elasticsearch after making changes.
Update NAT port forwarding settings in VirtualBox to expose port 9200 from the VM to the host.
🌍 6. Test From Host Machine
From your host system, run:
curl --cacert <path_to_http_ca.crt> -u elastic:$ELASTIC_PASSWORD https://localhost:<forwarded_port>
⚙️ 7. Optimize Memory Usage (Heap Tuning)
By default, Elasticsearch may consume more memory than needed. To reduce usage:
nano ~/elk_stack/elasticsearch-8.17.4/config/jvm.options
Update these lines:
- -Xms2g
- -Xmx2g
+ -Xms1g
+ -Xmx1g
✅ 1 GB heap is recommended for development and VM-based testing.
📁 Screenshots
All screenshots used in this guide should be placed in:
/images/01-install-elasticsearch